1.0 Manage User / Account
- Figure 1.1 below shows the main page of Manage User/Account :

Figure 1.1
Manager User/Account - Verified
- VERIFIED : mostly used to suspend verified customers.
Suspend one customer
Figure 1.2 shows Verified List.
Based on Figure 1.2 choose a customer that admin wish to suspend and click the Suspend button :
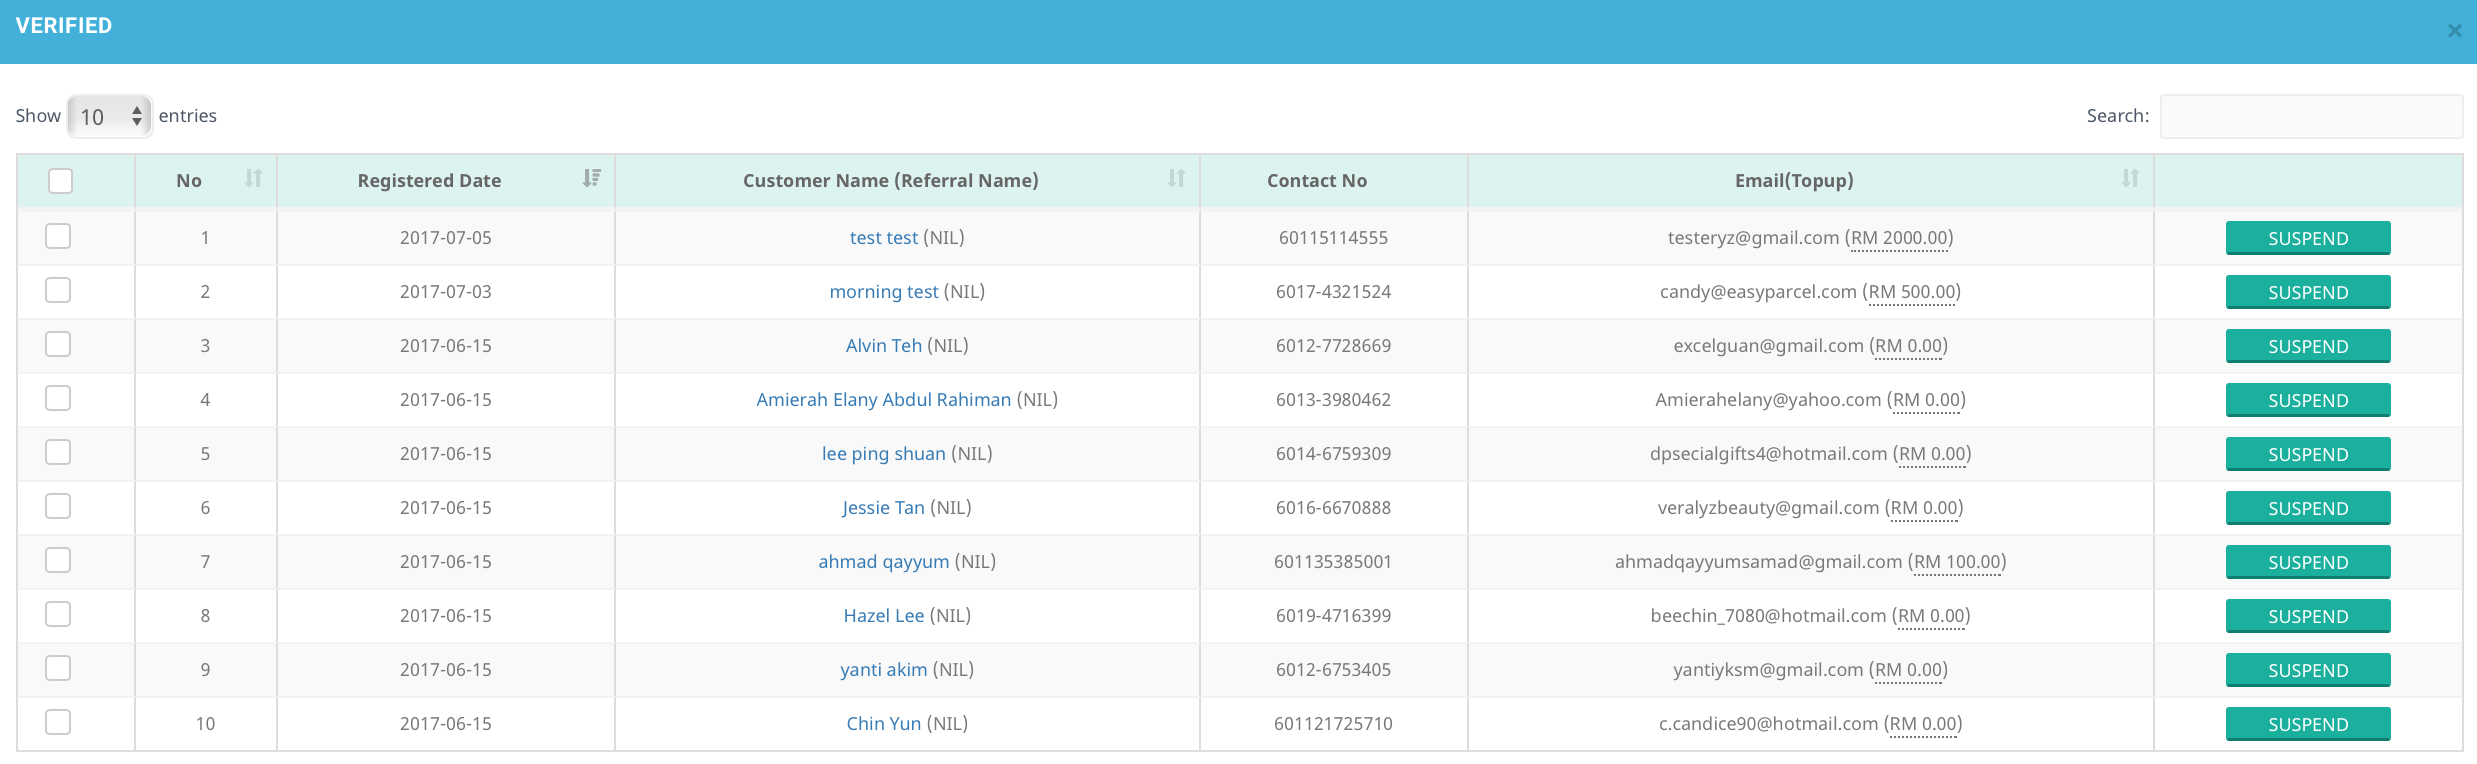
Figure 1.2After clicking Suspend button, a popup message will appear as shown in Figure 1.3 :

Figure 1.3Based on Figure 1.3 if click Yes, the customer's name and details will be moved to Suspend box.
Suspend multiple customers
Tick the checkbox of desired customers to be suspended as shown in Figure 1.4 :
Figure 1.4Click the black Suspend button shown in Figure 1.4 to suspend selected customers.
Figure 1.5 is a popup message that will appear :

Figure 1.5Based on Figure 1.5, if click Yes, the selected customer’s name and details will be moved to the Suspend box.
Manager User/Account - Unverified
UNVERIFIED : mostly used to suspend activated / unverified customers
Figure 1.6 below shows the Unverified customer list :

Figure 1.6To suspend a customer, the operation is same as Verified box.
After a customer has been suspended, their name will appear in Suspend box.
Manager User/Account - Pending
PENDING : Mostly used to suspend customers which are in pending activation status.
Figure 1.7 below shows Pending customer list :
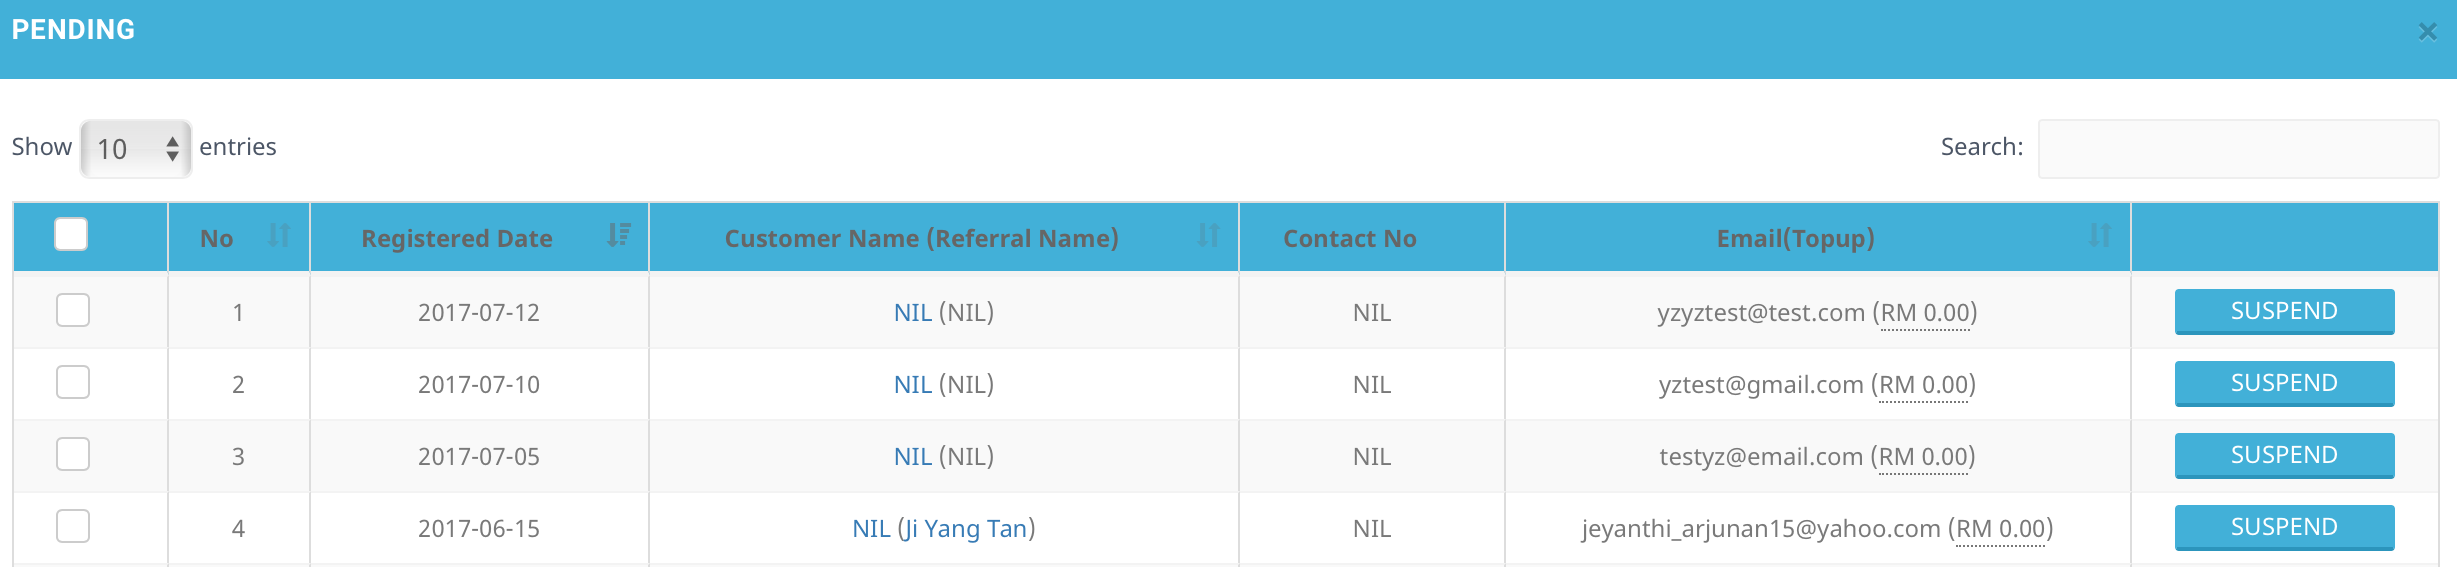
Figure 1.7The step to suspending is the same as in Verified.
The difference is, after the customer is activated from Suspend box, their name and details will go back to Pending Activation box.
Manager User/Account - Suspend
SUSPEND : Mostly used to activate suspended customers.
Figure 1.8 below shows the Suspended customer page with orange button for the purpose of activating customer from ‘Suspend’ status.
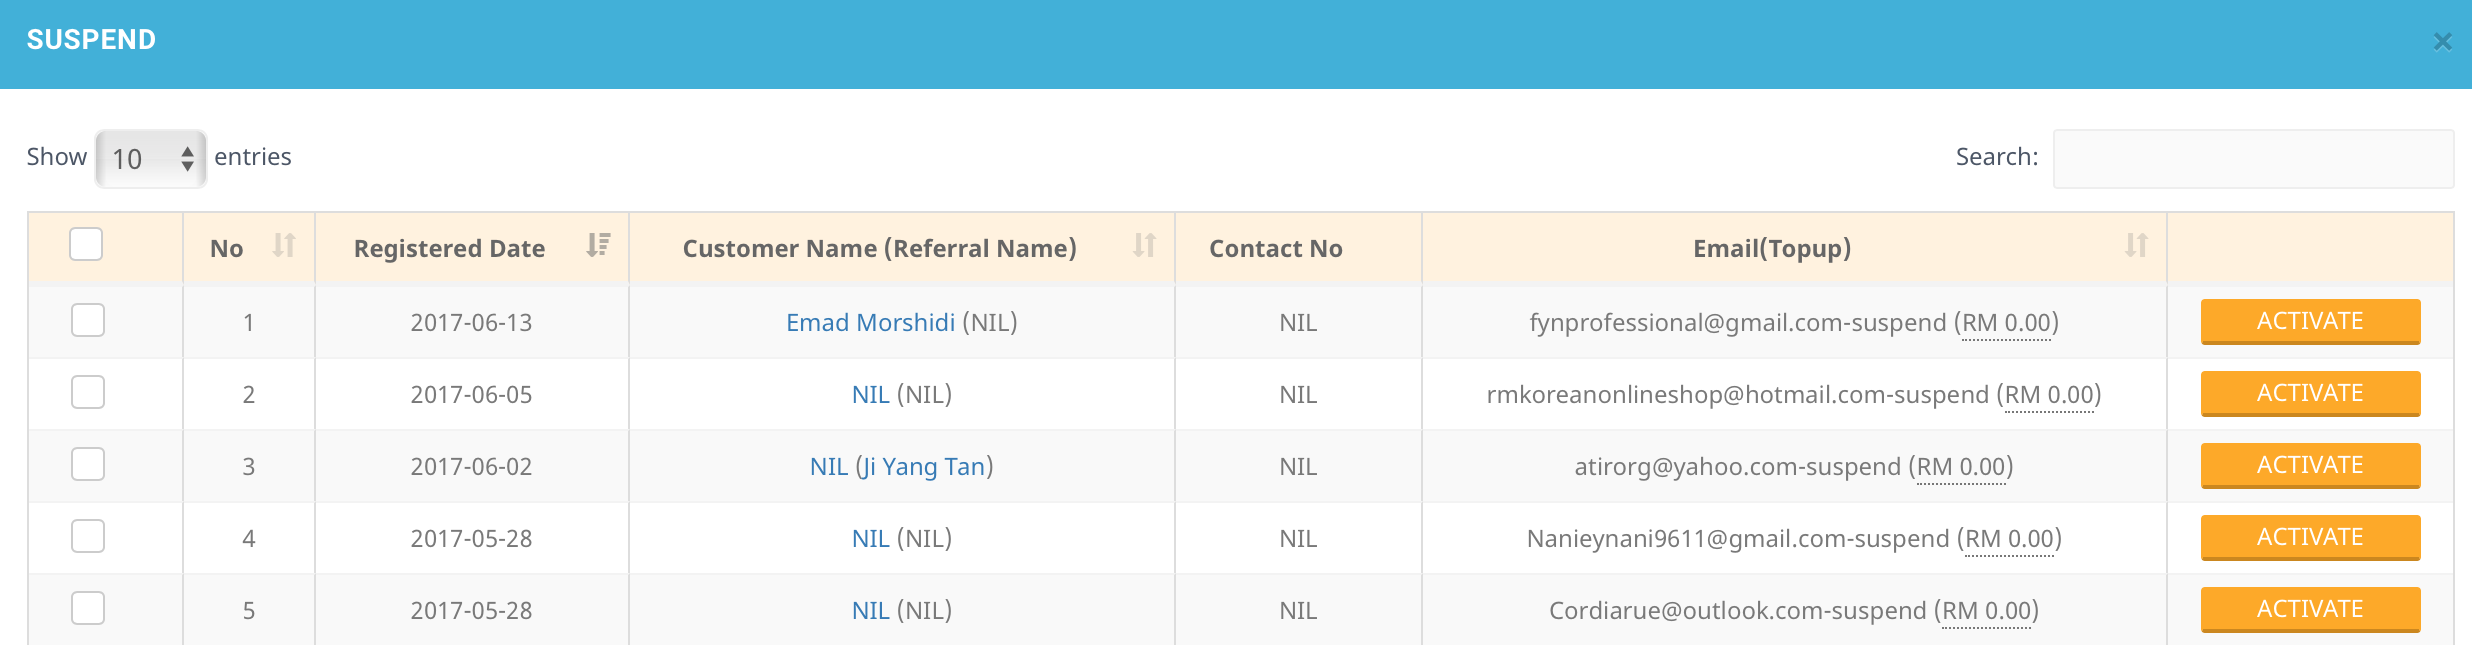
Figure 1.8To activate a customer, the operation is same as suspending customer as mentioned above.
After a customer has been activated, the account status will be changed from ‘unverified’/‘suspend’ to ‘verified’/‘active’.
To activate multiple customers, the operation is the same as activating one customer.
Manager User/Account - Expired
EXPIRED : Mostly used to display expired customers name list.
Figure 1.9 below is sample table of expired customers name list :
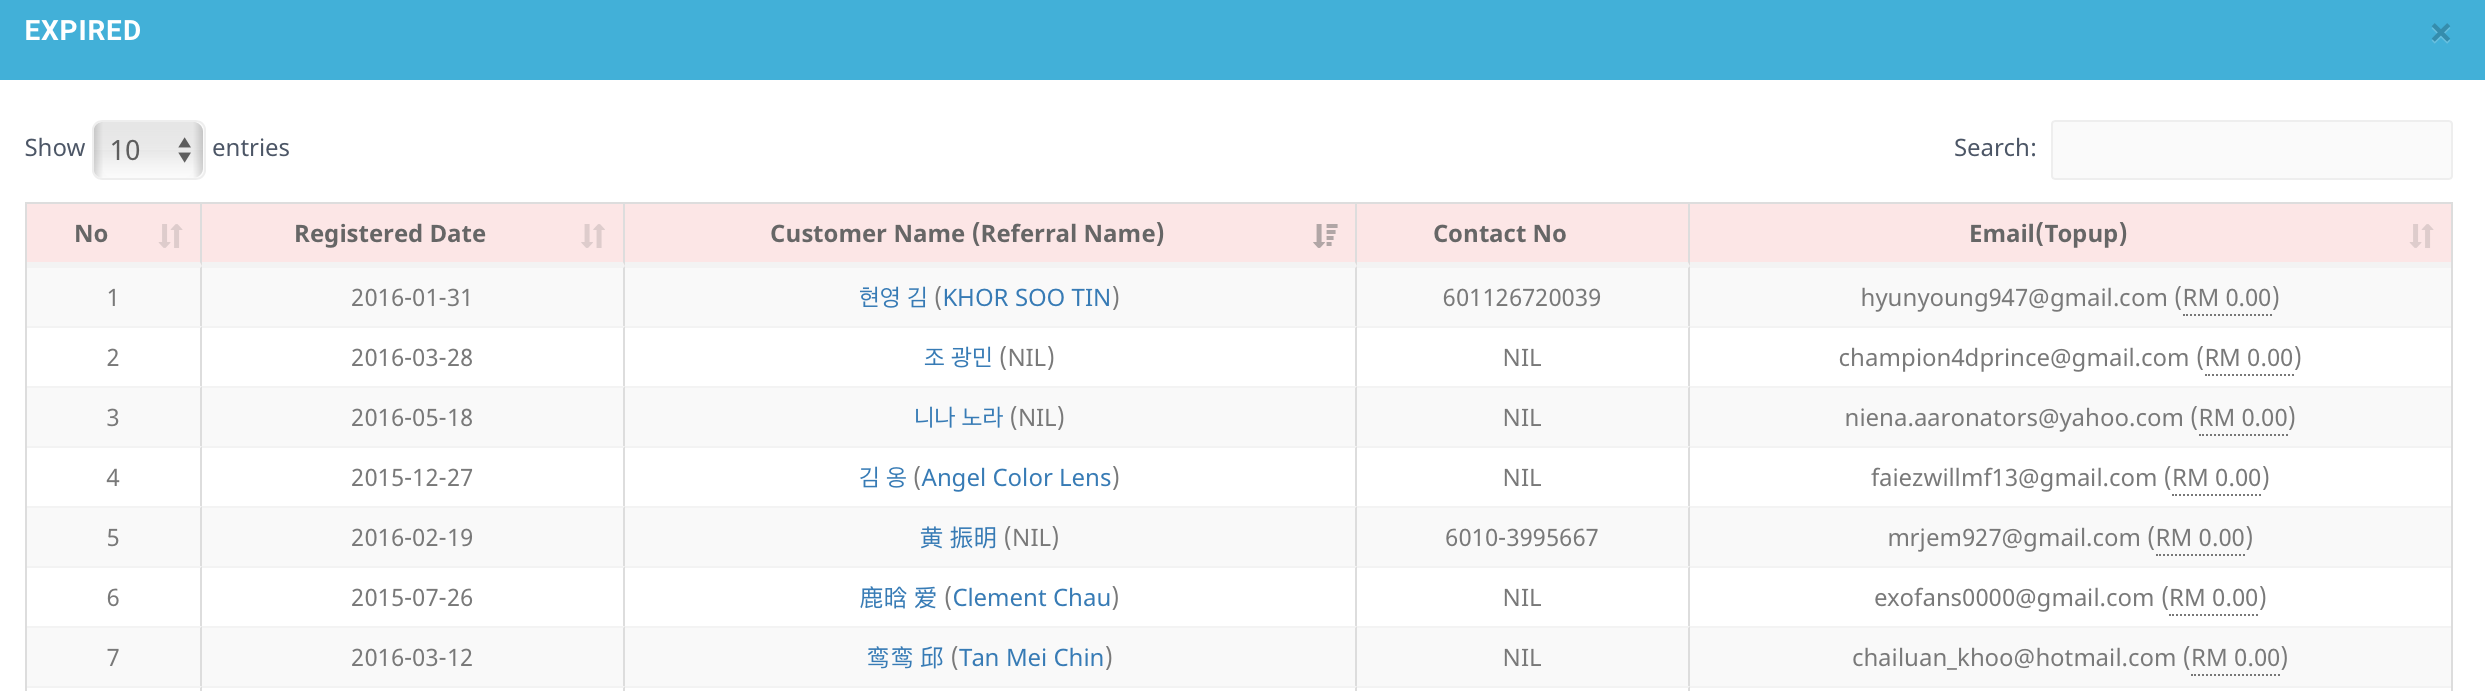
Figure 1.9To show more details of a particular customer, admin can click on customer’s name link as shown in Figure 1.9.
User Manager - Manage User/Account
- To search for customer’s account by either one criteria to check on customer’s profile or to get necessary data from customer’s profile.
A. Account Info Tab
i. Overview Details
- Under Account Info, Overview Details tab shows the details of the customer account status.
ii. Personal Details
Personal Details shows the basic information of a customer as shown in Figure 1.10 :

Figure 1.10admin can edit the Contact Number row only if the contact number exist like in Figure 1.11 below :

Figure 1.11After finish editing, click on the blue color tick as shown in Figure 1.12, and the contact number will change. The contact number will remain unchanged if admin cancel the edit. :

Figure 1.12Admin also able to enter the new verification code to customer by clicking on the Enter Verification Code link. Figure 1.13 below is an example :

Figure 1.13As long as the the contact number is not verified, admin can key in the contact number and the verification code will be sent to the respective contact number. Figure 1.14 below is the sample :

Figure 1.14If the admin enter the wrong Verification Code, a fail pop out window will Appear as in Figure 1.15 :

Figure 1.15
iii. Credit Card Details
On the Credit Card Details tab, admin is able to see the credit card details by the customer, Figure 1.16 below is the sample :

Figure 1.16If the customer has added in their credit card details, the result will be as in Figure 1.17 below :

Figure 1.17
iv. Login Details
- in the Login Details tab, admin can view the login details of the customer such as last login date, join date and approve date. Figure 1.18 below shows the sample :

Figure 1.18
v. Address Details
- In the Address Details tab, admin is able to view the customer address, Figure 1.19 below shows the sample :

Figure 1.19
vi. Group Details
In the Group Details tab, admin is able to view the customer groups, as shown in Figure 1.20 below :

Figure 1.20There will be a drop down list as in Figure 1.21 for promotional group that can be selected by admin. After selecting, click on the Update button.

Figure 1.21Admin can also assign API KEY to customer by clicking on Request API Key red button. The sample is as in Figure 1.22 below :

Figure 1.22Figure 1.23 shows a pop up message, if admin wish to request API click Yes and an API Key will be assigned to the customer.
Figure 1.23
B. Topup History Tab
- If admin wanted to view the Topup history of the customer, they need to click the Topup History tab as shown in Figure 1.24 :

Figure 1.24
C. Order History Tab
If admin want to check the order history of the customer, they need to click the Order History tab as shown in Figure 1.25 :

Figure 1.25Admin can choose the data they would like to view by clicking on the tab as shown in Figure 1.25 above.
For example in Figure 1.26, when click on the PAID, it will link to the Paid Order List :

Figure 1.26
D. Shipment History Tab
If admin wants to check the shipment history of customer, they need to click on the Shipment History tab as shown in Figure 1.27 :

Figure 1.27Each blue tab in Figure 1.27 shows different types of data that can be viewed by admin, by clicking on the tab, it will link to its respective list :
For example in Figure 1.28 , when click on DELIVERED, the list will appear as below :

Figure 1.28If admin want to find out more about the parcel information, they can click on the PARCEL DETAILS button under Operation column as in Figure 1.29 :

Figure 1.29After click on the PARCEL DETAILS button, Parcel Details list will show out. Figure 1.30 below shows an example :

Figure 1.30Admin can also straight away edit/update shipment details by selecting a parcel and then fill up details such as change status, change pickup date and report parcel as in Figure 1.31 :

Figure 1.31Based on Figure 1.32, the steps to update parcel pickup date :
- For example, if admin wants to update pickup date, first they have to select aparcel;
- Parcel No. ‘EI-DGE1P’ is selected, and the date is changed from 10-07-2017 to 12-07-2017;
- Next click on Update Pickup Date button to save changes. A pop up message will appear.

Figure 1.32
If admin, click the Refresh button, they can see the changes made on the parcel as in Figure 1.33 :

Figure 1.33Besides view the parcel details information, admin also able to view the Order Details, Log List, Download the AWB as pdf file and Report Issue when the parcel late delivery or request proof of delivery.
There are 2 section under the Shipment History, one is Basic Shipment History, the other one is Advanced Shipment History as in Figure 1.34 :

Figure 1.34For the Advance Shipment History, if the customer using other payment method instead of using easyparcel credit, the data will store in the INSTANT PAY List.
E. Credit History Tab
If admin want to check the transaction detail, refund and others, they need to click on the Credit History tab. Figure 1.35 below shows the interface of the Credit History after admin click on it :

Figure 1.35If admin only want to view the amount of balance of each customer, they need to choose the Finance Credit History as shown in Figure 1.36 :

Figure 1.36
F. Group History Tab
- If admin wants to check which group customer had assigned before, they can click on the Group History tab and view it. Figure 1.37 below shows the example :

Figure 1.37
Search Function
Based on Figure 1.38 is the search function on the main page of Manage User / Account is used to search customers record came from all five main list such as VERIFIED, UNVERIFIED, PENDING, SUSPEND and EXPIRE.
Figure 1.38It can be search by Name, Email, IC or Mobile number as shown in Figure 1.39 :.

Figure 1.39If search by MOBILE, by entering the customer’s contact number, admin is able to search the details of the customer by clicking the SEARCH BY to MOBILE, Figure 1.40 is an example when admin enters contact number :

Figure 1.40The expected result is as the Figure 1.41 below :

Figure 1.41If search by Email, the input must be in a set of complete email address eg: damar@easyparcel.com.
If search by IC, the input example are ‘880624-35-5151’. Must have “-” as separator else if the record will not be found.
For another search column as shown in Figure 1.42 is to search matching data on that particular table record. So it only will appear after you clicked on one of the boxes. Example below are Verified list :

Figure 1.42It can be used to search No, Registered Date, Customer Name, Contact No and Email. The input requirement must be following the format from the record displayed. Eg: if search registered date, it must be in YYYY-MM-DD form.
User Manager - Manage User/Account FAQ
Suspend one user
Manage User/Account ->Verified
Choose on the customer that you wish to suspend and click Suspend button as in Figure 1.43 :

Figure 1.43The suspended customer's name will go to Suspend box.
Suspend multiple user
Manage User/Account -> Verified
Based on Figure 1.44, tick the check box on desired customers.

Figure 1.44Then click on the Suspend button as in Figure 1.45 in order to suspend selected customers.

Figure 1.45Selected Suspended customer’s name will go to Suspend box.
Activate user
Manage User/Account -> SUSPEND
Figure 1.46 shows Suspended customer page with orange button for the purpose of activating customer from Suspend status.
Figure 1.46To activate more than one customer, the operation is same as suspending one customer
After a customer has been activated, their status will be changed.