2.0 Shipment Manager

Figure 2.0
Based on Figure 2.0, the main functions of Shipment Manager consist of :
- Manage Shipment
- Instant /PAYGo List
- Manage Follow Up
- Manage Report Issue
2.1 Manage Shipment
To search for shipment details and/or to update necessary information and to perform support task.
Figure 2.1.1
- Based on Figure 2.1.1, there are several tasks that can be performed :
Under Manage Shipment
- Parcel Cancel Request is the list of customers that wants to cancel their parcel.
- Address Change Request is the list of customers that want to cancel their parcels addresses.
- Today Collection is a list of all today parcel collections. This is a daily record which consist of all the information of parcel that will be collected in that particular day.
Under Manage Follow Up
- Manage Follow Up is the list of all the follow-up case by customer support team.
Under Manage Report Issue
- Manage Normal Issue is the list of all normal issue reported by customer themselves.
- Manage insurance50 Issue is the list of all insurance50 issue reported by customer themselves.
1.Parcel Cancel Request
Parcel Cancel Request is a System based cancellation request panel upon customer’s request to be approved/rejected by Relationship Executive
After clicking on Parcel Cancel Request, it will show the Parcel Cancel Request list like in Figure 2.1.2 below :

Figure 2.1.2Those pending request shown on the list above are waiting for the admin to approve/reject it.
Customer is only allowed to select one Reason for cancellation in Parcel Cancel Request.
i. Missed pick up
ii. Customer cancelled order
iii. Duplicate order > To provide with new tracking
iv. Wrong courier > To provide with new tracking
Only ship status of the parcel in ‘Schedule in Arrangement’ and ‘To be collected’ due to fully missed pickup will able to do approve and refund action. Other than that will not be allowed to do the action.
For the Approve And No Refund action, it can be done under the condition parcel in “To be collected” ship status due to partially missed.
If admin wish to Approve/Reject/Close the customer request, they need to click on the respective buttons under the Operation column as shown below in Figure 2.1.3 :

Figure 2.1.3There are two types of approval; Approve with Refund and Approve with No Refund
Approve and Refund Parcel Only
- Admin accept customer's request to cancel parcel and the payment for parcel only will be refunded to the customerc
Approve and Refund Parcel + SMS
- Admin accept customer's request to cancel parcel and the payment will be refunded for both parcel and sms charges to the customer.
Approve and No Refund
- Admin accept customer’s request to cancel parcel but the payment will not be refunded to the customer
Reject
- Used by admin to if customer wrongly clicked the cancellation button and requested for reject.
Close
- Used by admin if customer wrongly clicked the cancel request button and requested to be removed from system.
2. Address Change Request
- Address Change Request is the System based address change request panel is to be approved/rejected by Relationship Executive.
- Customer is allowed to change street address (applicable for minor changes, non-inclusive of postcode and state)
After clicking on Address Change Request, a list will be displayed like in Figure 2.1.4 :

Figure 2.1.4Some of the actions that can be performed under Operation column are :
a) Change Action
- Perform Change action when Collection/Delivery address request from line one to line four provided under Schedule in Arrangement status
- Or Collection/Delivery address request from line one to line four provided under To Be Collected
b) Reject Reason
- Perform Reject Action when Collection/Delivery address from line one to line four includes alternative postcode than the original address.
c) Close Action
- Admin can click on the close button to cancel off the request without approving/rejecting
Search Function in Shipment Manager
The search function is normally used to search customer’s parcel details. Based on Figure 2.1.5, there are 2 types of search functions; Basic Search and Advance Search.
Figure 2.1.5
Basic Search

Figure 2.1.6
Based on Figure 2.1.6, admin can search shipment by keying in the following input :
AWB No. : To search for one/multiple shipment using parcel AWB No
Order No : To search for one/multiple shipment under one Order No
Parcel No. : To search for one/multiple shipment using Parcel No
Pickup ID. : To search for shipment using Pickup ID
Sender Name : To search shipment without AWB case
Receiver Name : To search shipment without AWB case
Sender Company Name : To search for shipment without AWB case
For example, if admin would like to search parcel information by parcel number, enter the EP-IBVWC in the search bar, then select Parcel No, as shown in Figure 2.1.7 :

Figure 2.1.7After clicking on Parcel No, the search result be displayed like in Figure 2.1.8 :

Figure 2.1.8Based on Figure 2.1.9, if admin wants to search multiple parcel's information, they just need to add a comma(,) between the input. For example, searching by parcel number EP-IBVWC, EP-IBVRQ :

Figure 2.1.9Figure 2.1.10 below shows the search result :

Figure 2.1.10
Advance Search
- The purpose of Advance Search is to get parcel details for when admin doesn't have any details such as order number, tracking number, parcel number, sender name and act.
Figure 2.1.11 below shows the step for advance search :

Figure 2.1.11For example in Figure 2.1.12, if admin wish to search the Parcel information that falls on date range between ’03/04/2017’ (DD/MM/YYYY) to ’02/06/2017’ (DD/MM/YYYY), the type of the courier is ‘Poslaju’ and the status of the parcel is ‘Collected’.

Figure 2.1.12When click on Search button, the result that matches the condition will appear as shown in Figure 2.1.13 :

Figure 2.1.13Based on Figure 2.1.14, sms charges is also shown in Parcel List :

Figure 2.1.14Based on Figure 2.1.15, Operation column consist of Parcel Details, Order Details, Log List, Download AWB and Report P.Issue.

Figure 2.1.15If admin wish to check more detailed information of the parcel, they can click on the Parcel Detail button as shown in Figure 2.1.16 :

Figure 2.1.16
A.Parcel Details
After click on the Parcel Detail button, a parcel detail window will prompt out as shown in Figure 2.1.17 :

Figure 2.1.17Based on Figure 2.1.18, if the parcel is Pgeon, Pgeon Number will be displayed in Parcel Details :
Figure 2.1.18
i. Shipment Details
Based on Figure 2.1.19, under the Shipment Details tab, admin can click on the Name to view more detailed information of the sender.

Figure 2.1.19If admin click on the Name, it will link to User Details page and admin can find the information of the User there.
ii. Parcel Overview
Based on Figure 2.1.20, Parcel Overview shows parcel detail such as the size of the parcel, type of parcel, destination of parcel and other relevant informations.

Figure 2.1.20Admin are able to change the Parcel Type, Parcel Content and Goods Value in Parcel Overview tab by clicking on the word pointed by arrow below in Figure 2.1.21 :

Figure 2.1.21If admin wish to change the Parcel Type from parcel to document, they just need to select a value from the dropdown list as shown in Figure 2.1.22 below :

Figure 2.1.22After admin have selected the parcel type, click the tick icon as in Figure 2.1.23 to save changes.

Figure 2.1.23Figure 2.1.24 shows a success pop up message that will appear :

Figure 2.1.24Now the Parcel Type will shows the changes made by admin as in Figure 2.1.25 :

Figure 2.1.25For Parcel Content and Goods value, repeat the step shown in Figure 2.1.23 until Figure 2.1.25.
If courier admin or our admin need Parcel Overview details, they can click on the “Copy” button and copy down the summary and send to them as shown in Figure 2.1.276:
Figure 2.1.26After click on the COPY button, a small prompt out tab will exist as shown in Figure 2.1.27 :

Figure 2.1.27
iii. Collection Details
Parcel Pick up address and contact details.
Only Topup User are allowed to edit their Collection Details as shown in Figure 2.1.28 below :

Figure 2.1.28If courier admin or admin need Collection details, they can click in the "copy" blue button as shown in Figure 2.1.28 and copy down the summary shown in Figure 2.1.29 and send to them :

Figure 2.1.29Admin are able to change the detail of the collector in Collection Details. All the fields in the Collection Details in Figure 2.1.30 are editable :

Figure 2.1.30For example based on Figure 2.1.31, if admin want to add the email, company name, alternative contact number they can click on the dashed line(--) or the existing data (in blue color font) to change the data.

Figure 2.1.31Click the tick icon in Figure 2.1.32 to save the changes :

Figure 2.1.32For the red boxes highlighted in Figure 2.1.33 below shows the dropdown list :

Figure 2.1.33Admin can select a value from the dropdown shown in Figure 2.1.34 :

Figure 2.1.34For Non-Topup User, their collection details aren't allowed to be edited. Figure 2.1.35 shows an example :

Figure 2.1.35
iv. Delivery Details
Parcel delivery address and contact details.
Only parcel with status Schedule In Arrangement or To Be Collected are allowed to edit their delivery address. Figure 2.1.36 shows delivery details for a parcel with Schedule In Arrangement status :

Figure 2.1.36If courier admin or admin need delivery details, they can click on "Copy" button (in red box in Figure 2.1.36) and copy down the summary as shown in Figure 2.1.37 and send to them.

Figure 2.1.37Admin are able to change the detail of the sender in delivery details, All the fields in the delivery details Ain Figure 2.1.38 are editable :

Figure 2.1.38For example in Figure 2.1.39, if admin want to add the email, company name, alternative contact number, the y can click on the dashed line(--) or the existing data (in blue color font) to change the data.

Figure 2.1.39Click the tick icon as shown in Figure 2.1.39 to save changes like in Figure 2.1.40 :

Figure 2.1.40For the red boxes highlighted in Figure 2.1.41 below shows dropdown lists :

Figure 2.1.41Admin can select a value from the dropdown shown in Figure 2.1.42 :

Figure 2.1.42For parcels with status besides Schedule In Arrangement or To Be Collected, their delivery details aren't allowed to be edited. Figure 2.1.43 below shows an example of delivery details for parcel with status Collected :

Figure 2.1.43
v. Shipment Log
Shipment Log is a record showing activity/changes that has been done by admin in Parcel Detail.
Figure 2.1.44 shows an example of Shipment Log :

Figure 2.1.44
Figure 2.1.45In the orange highlighted box shown in Figure 2.1.45 shows ’10’ meaning only 10 data will be shown per page. Same goes for the rest of the value in the dropdown list.
For the red highlighted box shown in Figure 2.1.45 above, is a Search function bar, admin can enter keyword inside to search the matching result.
For example based on Figure 2.1.46, admin wanted to check who changed the alt contact before, so they can type ‘alt contact’ in search bar.

Figure 2.1.46
vi. Parcel File Upload
Figure 2.1.47 shows Parcel File Upload :

Figure 2.1.47Parcel Photos is used when customers are unable to upload their parcel photo into the system. So customers will send the photo via email to admin. Then admin will upload the photo.
* i - ii is based on Figure 2.1.48Click on “Upload Parcel Image”, then it will prompt out a window
Choose the photo that sent by customer. Then click "Choose". It can upload maximum of six photos only and each time only one photo can be chosen to be uploaded.

Figure 2.1.48Figure 2.1.49 shows a pop up message when the photo is successfully uploaded :

Figure 2.1.49Based on Figure 2.1.50, admin can view the photo directly by clicking on the magnifier button. Admin can also delete the photo by clicking on the yellow (x) button under the Magnifier button.

Figure 2.1.50
Parcel Invoice is used when customers are unable to upload their parcel invoice into the system. So they will email and send the invoice to admin. Then admin will help them upload the file.
*i - ii is based on Figure 2.1.51click on Upload Invoice then it will prompt out a window :

Figure 2.1.51choose the invoice that was sent by customer. Then click "Choose". It can upload maximum of six invoices but each time only one invoice can be selected to be uploaded.
Figure 2.1.52 is a pop up message when invoice is successfully uploaded :

Figure 2.1.52Based on Figure 2.1.53, admin can view the file directly at here by clicking on the magnifier button. Admin can also delete uploaded invoice by clicking on the orange (x) button under the magnifier button.

Figure 2.1.53
B.Order Details
The Order Details will show all the parcel details with a same order number as shown in Figure 2.1.54 :

Figure 2.1.54After clicking on the Order Details, a list will be prompt out as shown in Figure 2.1.55. If admin want to view the information of other parcels with the same order number, they can click on the Airway Bill under the awb column to view the parcel detail.

Figure 2.1.55After clicking on the Airway Bill under the awb column in Figure 2.1.55, it will link to the Parcel detail that store the information of each parcel respectively shown in Figure 2.1.56 :

Figure 2.1.56
C.Log List
Log List displays activities/changes log made by agent visible to anyone accessing the file. Figure 2.1.55
Figure 2.1.56 below shows the examples after clicking on the Log List button in Figure 2.1.55 :

Figure 2.1.56
D.Download AWB
If admin want to print out the Airway Bill, they can click on ‘Download AWB’ as shown in Figure 2.1.57 :

Figure 2.1.57Figure 2.1.58 shows a pdf file will automatically be downloaded.

Figure 2.1.59Figure 2.1.60 is an example of the AWB pdf file :

Figure 2.1.60
E.Report P. Issue
For updating additional remark for reporting purposes (missed pickup, lost, damage, other) and to include ticket number for further references.
If customer haven’t receive their parcel that was supposed to arrive on that particular day, or damaged or ect. Customer can complain the issue by informing the admin. Then admin can help by reporting the parcel in the admin control panel.
To report the parcel click on the Report P.Issue as shown in Figure 2.1.61 :

Figure 2.1.61After that, the issue reporting box will be prompt out as shown in Figure 2.1.62 :

Figure 2.1.62For example in Figure 2.1.62, if the customer complaint about late delivery time of their parcel, admin can select "Late Delivery" from the dropdown list :
Then click on the "Report" button as in Figure 2.1.62 to report the parcel :
After click on the Report button, a pop up message "Shipment Issue Reporting" be prompt out.
Then the issue will be recorded in Manager Report Issue section and waiting for the admin to assign agent to solve the issue.
Change Pickup date for multiple/single parcel
The following parcel status are allowed to update its pickup date :
Cancel by User
Waiting for Payment
To be Collected
Returned
On Hold
Expired
Drop Off
Based on Figure 2.1.63 for example if customer requested to change/delay their parcel pickup date from ‘2017-07-12’ to ‘2017-07-11’, select the date on Change Pickup Date column. Admin have to tick the checkbox of the particular parcel before clicking on ‘Update Pickup Date’ button.

Figure 2.1.63After clicking on the Update Pickup Date button, a message will be prompt out as in Figure 2.1.64 :

Figure 2.1.64Then click Refresh button on top left to see the changes made as shown in Figure 2.1.65 :

Figure 2.1.65*note : Repeat the same step to make changes on multiple/all parcels
Change current ship status for multiple/single parcel
Based on Figure 2.1.66, In order to change the current ship status for the selected parcel, admin need to select the status they wish or change in first box, followed by selecting a value from a dropdown list and the last box is remarks (compulsory).

Figure 2.1.66Figure 2.1.67 shows the option in Change Status dropdown list :

Figure 2.1.67In Figure 2.1.68 for example, if admin want to change both selected parcel ship status to Cancel by Admin, followed by no refund and the remarks is test. Before clicking on the Update button, make sure you tick on the checkboxes on first column below to indicate you would like to make changes on the selected parcels.
Figure 2.1.68Then a ‘Shipment Status Change’ box will prompt out, click Yes to confirm the changes as shown in Figure 2.1.69 :

Figure 2.1.69Figure 2.1.70 shows the success update message that will be prompt out :

Figure 2.1.70Click on the Refresh Button on top left to see the changes made as shown in Figure 2.1.71 :

Figure 2.1.71*Note : Repeat the same step to make changes on multiple parcels.
Report Parcel Issue for multiple/single parcel
Figure 2.1.72 is for Admin to Report Parcel with issues such as missed pickup, late delivery, shipment lost, etc. :

Figure 2.1.72Admin can tick the selected parcels followed by selecting the corresponding issue and remarks (compulsory) of the parcels as shown in Figure 2.1.73 :

Figure 2.1.73After that, click on the Update and a Parcel Update Status message will prompt out as shown in Figure 2.1.74 :

Figure 2.1.74The issue will be recorded in Manage Report Issue section for admin to assign an agent to solve the issue.
2.2 Instant/PAYGo List
Figure 2.2.0 below show the way to enter the Instant/PAYGo list :

Figure 2.2.0Figure 2.2.1 below shows the main page of Instant/PAYGo List :

Figure 2.2.1Based on Figure 2.2.1, there are two main list in the table; INSTANT PAY list and PAY AS YOU GO list.
The number besides the list is the total number of item consist in each list, for example there are 2241 data exist in the Instant Pay list and 844 data exist in Pay As You Go list.
A. Instant Pay List
When click on the INSTANT PAY, a list will be shown like in Figure 2.2.2 :

Figure 2.2.2Instant Pay List is a record to show those customer who pay through online banking during their buying in our system.
This is due to the customer having not enough credit in their easyparcel account, or customer not able to top up for some reason.
If customer make payment through online banking, the prices will be more expensive compared to them using easyparcel credit to pay.
If admin wish to view the details of the customers, they can click on the customer’s name as in Figure 2.2.3 and view the customer information.

Figure 2.2.3
B. Pay As You Go List
Pay As You Go list shown in Figure 2.2.4 is a record showing customer who are using this service without login as a member to quicken their process time.

Figure 2.2.4Admin can click on the ‘Order No’ as shown in Figure 2.2.5 to view the order details.

Figure 2.2.5
Search Function in Instant/PAY Go List
If admin want to search the user who are using the Instant Pay service on particular date, they need to select the date from the red box highlight on Figure 2.2.6 below and select Instant Pay List (blue box).

Figure 2.2.6For example in Figure 2.2.7, if admin want to search the user who use the instant pay service from ’2017-03-01’ (YYYY/MM/DD) to ’2017-06-02’ (YYYY/MM/DD) :

Figure 2.2.7Figure 2.2.8 is the sample result :
Figure 2.2.8If admin wish to search the customer who uses Pay As You Go Service, they just need to repeat step 1-3, but change the yellow boxes switch to Pay As You Go list as shown in Figure 2.2.9 .

Figure 2.2.9
Search Function Inside Each List
Figure 2.2.10 below shows the search function on Instant Pay List and Pay As You Go list :

Figure 2.2.10For example in Figure 2.2.11, if admin want to search the customer detail by Transaction No ‘T124356809000’, they need to enter the Transaction No in the Search Box.

Figure 2.2.11
Admin also can use the customer user name, pay date, remarks to search the customer detail in Instant Pay List
For the Pay As You Go List, admin can use order no, user name, order date, transaction no to search the customer detail.
2.3 Manage Follow Up
Figure 2.3.0 below shows the way to Manage Follow Up :

Figure 2.3.0Manage Follow Up is usually used by customer sales team to viewing the cases they currently following.
Figure 2 3.1 below is Manage Follow Up interface :

Figure 2.3.1Each colored tab based in Figure 2.3.1 above is clickable, and each individual boxes contain their respective data.
1.Only My Active Issue
Only My Active Issue is the issue followed up by the individual of customer sales team, only the cases managed by the individual can view the issues they currently follow up.
Figure 2.3.2, for example, picture below show the issue that currently handle by me, and this issue will only appear on ONLY MY ACTIVE ISSUE tab.

Figure 2.3.2‘ONLY MY ACTIVE ISSUE’ list will be displayed as shown in Figure 2.3.3 :

Figure 2.3.3
2. Today Active Issue
Figure 2.3.4 is Today Active Issue tab :

Figure 2.3.4Today Active Issue is the issue reported on the particular day. If the particular day has no issue, there will be no record.
3. All Active Issue
- All Active Issue is a record to show that all the active issue followed up by the whole customer sale team.
If admin want to view the particular issue, they need to click the All Active Issue tab as shown in Figure 2.3.5 below :

Figure 2.3.5Figure 2.3.6 below show the result after clicking on the All Active Issue :

Figure 2.3.6If admin want to view the History detail of the issue, they need to click on the ‘History’ button under the Operation column as in Figure :

Figure 2.3.7A Shipment Followup History List will be shown as in Figure 2.3.8 :

Figure 2.3.8If the issue is already solved, admin can close the case by clicking on the ‘Close’ button as shown in Figure 2.3.9 :

Figure 2.3.9For example in Figure 2.3.10 if the issue is already solved, by clicking the close button, the issue will be closed.

Figure 2.3.10After clicking on the ‘Close Case’ as in Figure 2.3.10 , a pop out will be shown in Figure 2.3.11 below :

Figure 2.3.11After clicking ‘OK’, the cases that was closed will now be removed from ALL ACTIVE ISSUES and moved to ALL IN-ACTIVE ISSUE. The status of the issue will be changed from Active to In-Active as in Figure 2.3.12

Figure 2.3.12If admin want to reopen the case, they need to click on the ‘Close’ button under Operation column like in Figure 2.3.12
After clicking on it, admin can see something similar like in Figure 2.3.13 below :

Figure 2.3.13Then click the ‘Reopen Case’ as in Figure 2.3.13 to reopen the case. A pop up message shown in Figure 2.3.14 will appear :
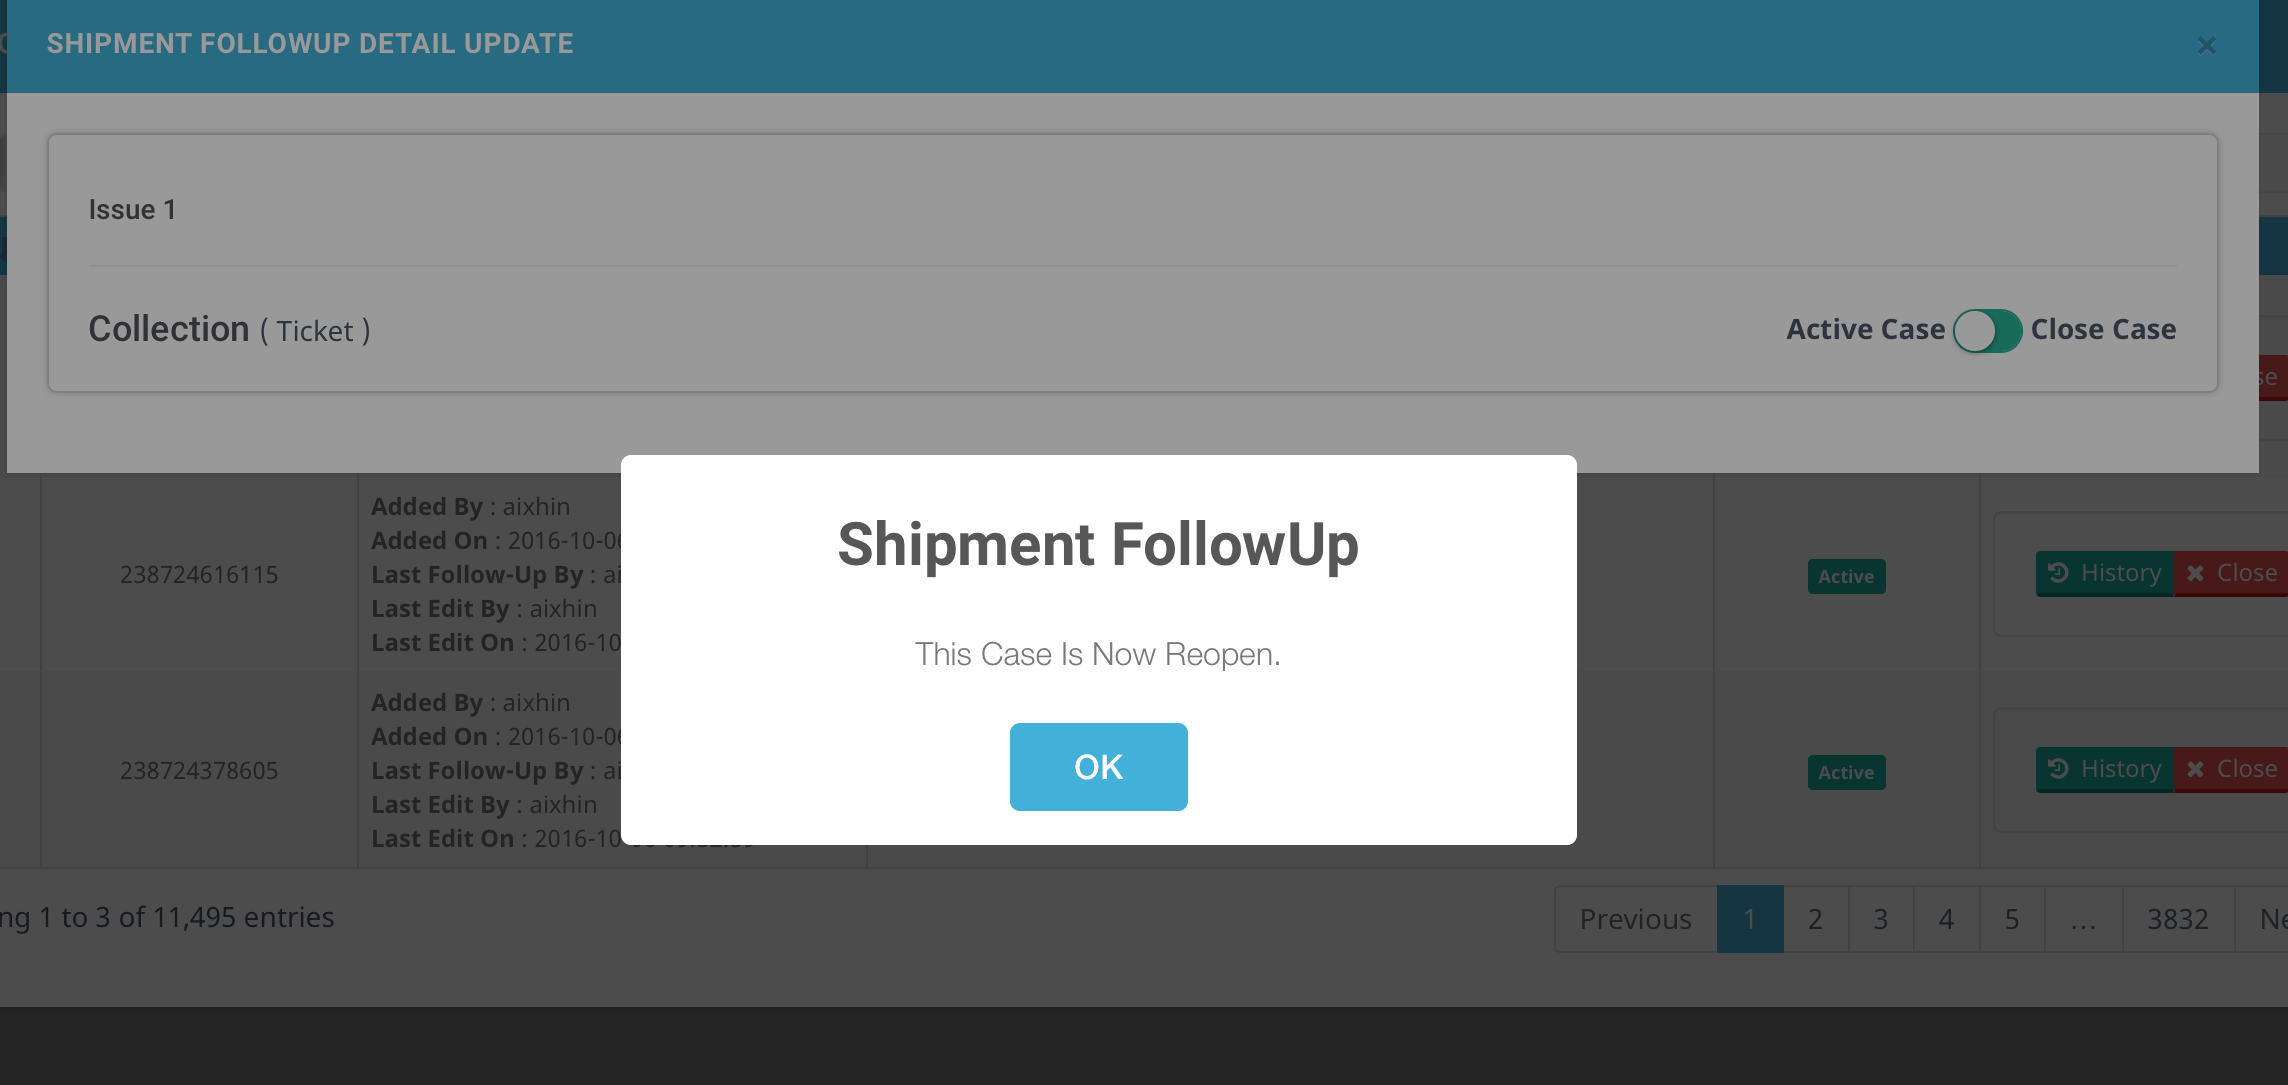
Figure 2.3.14The reopen case will be moved back to All Active Issue and the status will be updated to Active as shown in Figure 2.3.15 .

Figure 2.3.15
4. All In-Active Issue
- All In-Active Issue is a record showing all the cases closed by admin in the All Active Issue.
Figure 2.3.16 below shows All In-Active Issue tab :

Figure 2.3.16Figure 2.3.17 below shows All In-Active Issue list :

Figure 2.3.17
2.4 Manage Report Issue
Figure 2.4.0 below shows the way to Manage Report Issue page :

Figure 2.4.0Figure 2.4.1 below shows Manage Report Issue main page :

Figure 2.4.1Based on Figure 2.4.2 there are two list in the Manage Report Issue; Issue List and Insurance50 Issue.

Figure 2.4.2
A. Issue List

Figure 2.4.3
- Each boxes based on Figure 2.4.3 above is clickable, and after clicking, respective issue data will shown.
- The number in align with the boxes with different color shows the amount of data exist in each issues.
I. Total Issue
- Total Issue is a record where all the issue reported by customer regarding an issue such as parcel damage, parcel lost, late delivery, missed pickup and other cases.
Figure 2.4.4 below shows the list of total issues after admin click on the Total Issue.

Figure 2.4.4If admin want to view more information regarding the Issue reported by customer, they just need to click on theView Issue Detail.
After click on the View Issue Detail, a pop out will be displayed. For example if admin click on the first data in the Total Issues table, the Parcel Issue Reporting Detail will appear as shown in Figure 2.4.5 below :

Figure 2.4.5Inside the Parcel Issue Reporting Detail, admin also can check for the Issue’s Question & Response AND Issue’s Chat History. Figure 2.4.6 below shows the example :

Figure 2.4.6Admin may make new remark as shown in Figure 2.4.7 :

Figure 2.4.7for example in Figure 2.4.8 enter a new remark on the texbox :

Figure 2.4.8then click Enter Remark button, a pop up message will appear like in Figure 2.4.9 :

Figure 2.4.9admin can see the new remark made as in Figure 2.4.10 :

Figure 2.4.10
II. Unresolved Issue
- Unresolved Issue is a record where the issues reported from customer will directly be shown here.
Figure 2.4.11below show the list of Unresolved Issues.

Figure 2.4.11Based on Figure 2.4.11, Admin also can click View Issue Detail to view the detail information of the Issue.
The steps to adding new remark is the same as in Total Issue.
III. Opened Issue
Opened Issue is the record where the issue reported by customer is in progress of waiting courier site assign agent to help the customer check and resolve the issue.
Figure 2.4.12 below shows the list of ‘Opened Issue’.

Figure 2.4.12
Admin also can click View Issue Detail to view the detail information of the issue.
The steps to adding new remark is the same as in Total Issue.
IV. Unassigned Issue
- Unassigned Issue is the issues reported by customer but those issue haven’t has any agent assigned to solve that particular issue.
Figure 2.4.13 below show the list of Unresolved Issues.

Figure 2.4.13Admin also can click View Issue Detail to view the detail information of the issue.
V. Pending Issue
- Pending Issue is the issues reported by customer but those still pending for agent to solve it.
Figure 2.4.14 below show the Pending Issue.

Figure 2.4.14Admin also can click View Issue Detail as in Figure 2.4.14 to view the detail information of the issue.
The steps to adding new remark is the same as in Total Issue.
VI. Resolved Issue
Resolved Issue is a record where the issues reported by customer is already solved by the assigned agent. Agent will explain to customer why the issue occurs and the way to solve it.
Figure 2.4.15 below show the list of Resolved Issue.
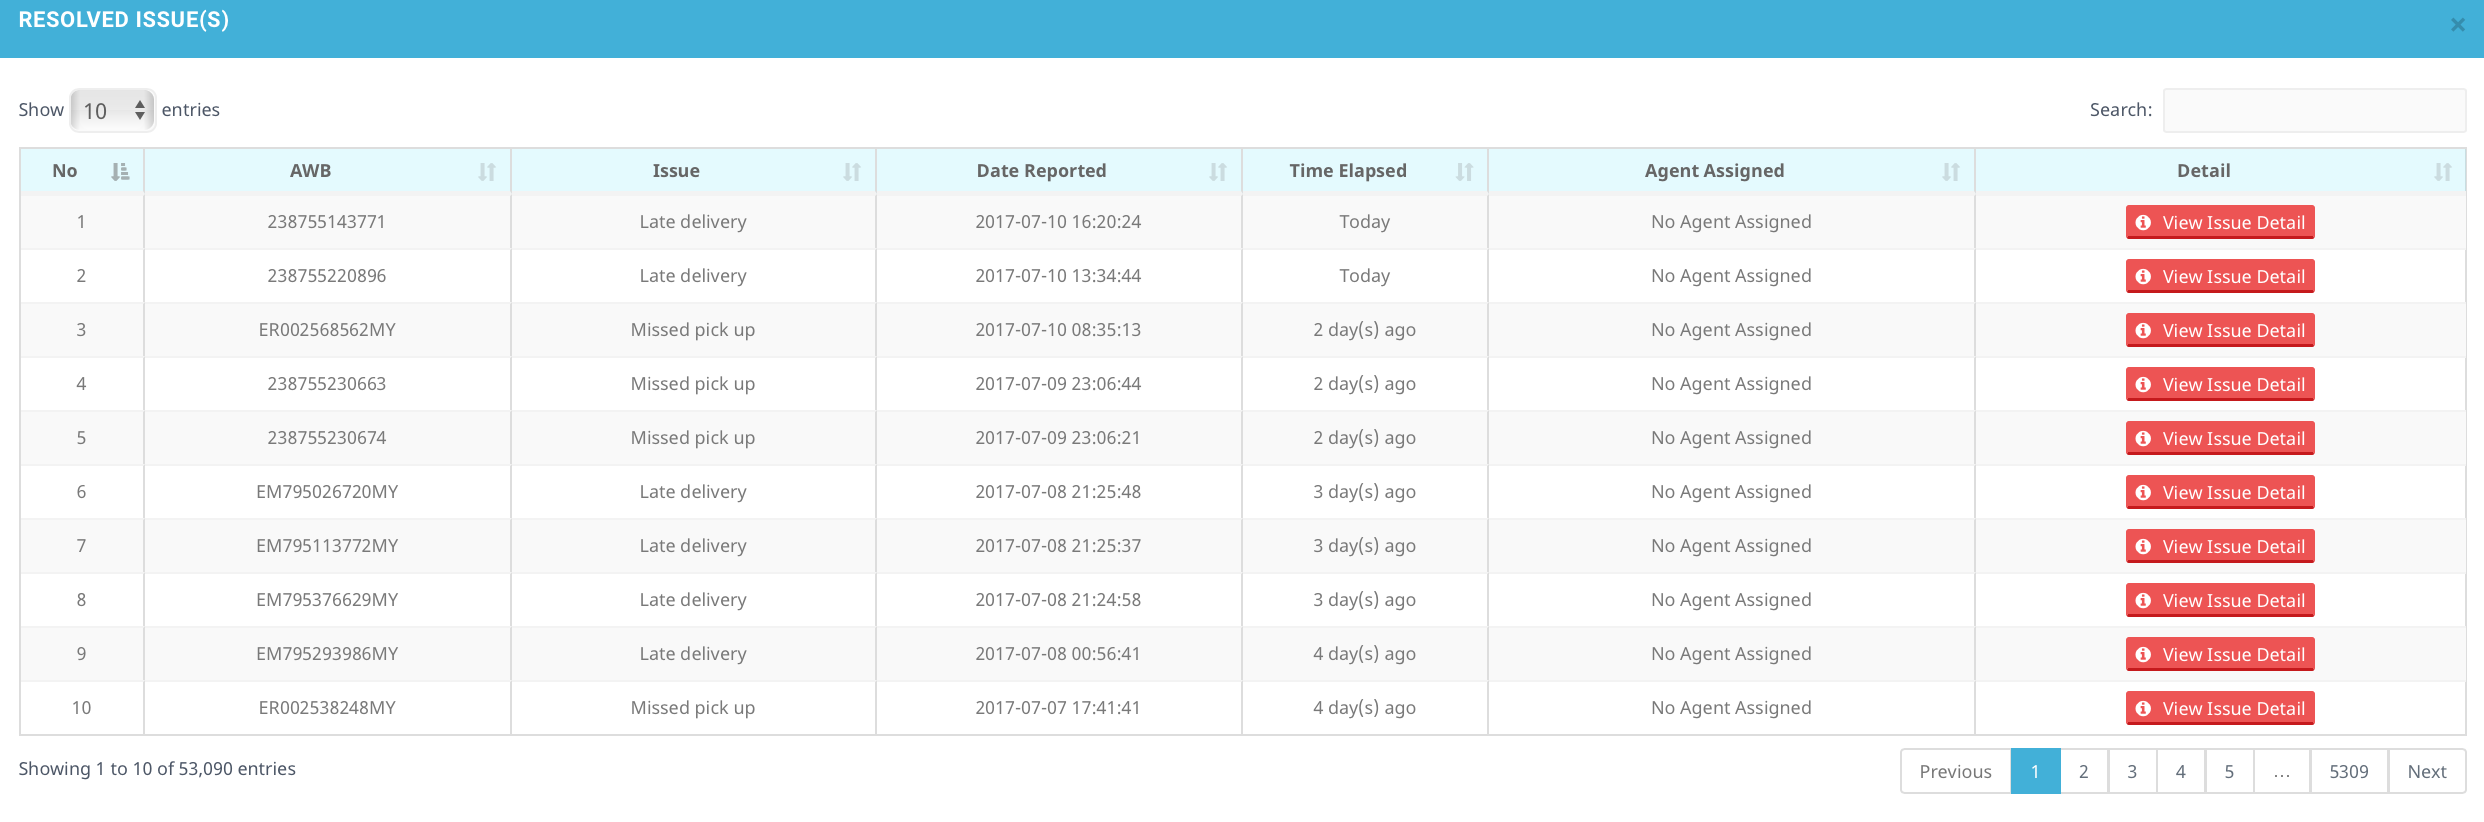
Figure 2.4.15Admin also can click View Issue Detail to view the detail information of the issue.
B. Insurance50 Issue
- Insurance50 issue is a record of third party insurance on each parcel and customer may claim the insurance if they had purchase an insurance for their parcel.
If admin want to view the Insurance50 Issue, they need to click on the button on red box in Figure 2.4.16 from Issues List to Insurance50 Issue.

Figure 2.4.16Each row are listed in Figure 2.4.16 is clickable, and each row has it’s own respective data.
I. Draft Parcel Lost Issue
First stage to claim insurance for Draft Parcel Lost Issues is to filter the document submitted by customer and make sure that it fulfils the condition to claim the insurance.
When click on the Draft, the Draft Issues will be shown as in Figure 2.4.17 :

Figure 2.4.17If admin want to check the document submitted by customer if it fulfils the condition to claim the insurance, they need to click on the View Issue Detail
If admin clicks on View Issue Detail, Parcel Issue Reporting Detail will be displayed like in Figure 2.4.18 :

Figure 2.4.18Parcel Content and Goods Value are editable. For example, admin wants to edit goods value, just click on column and enter the new value as shown in Figure 2.4.19 :

Figure 2.4.19next click on the blue tick icon(in red circle based on Figure 2.4.19) and admin can see the changes made as shown in Figure 2.4.20 :

Figure 2.4.20
Based on Figure 2.4.21, admin are able to upload photo and invoice of the parcel by clicking the red (+) button respectively, or remove them by clicking the orange (x) button;
admin can also edit the highlighted columns as shown in Figure 2.4.21 :

Figure 2.4.21example admin wants to edit Date item posted/check in, just click on the existing date, as shown in Figure 2.4.22 :

Figure 2.4.23change the date, and then click the blue tick icon(in blue circle based on Figure 2.4.23) to save changes made.
After admin finish checking the document submitted by the customer and doesn’t find any error, they can move the selected parcel to processing stage to claim the insurance by clicking on the Processing button.
Figure 2.4.24- after Admin clicks on Processing button as in Figure 2.4.24, “This case status has been updated” status will be displayed under Action column like in Figure 2.4.25:

- after Admin clicks on Processing button as in Figure 2.4.24, “This case status has been updated” status will be displayed under Action column like in Figure 2.4.25:
If admin finds that there is something missing in the document submitted by the customer, admin can request the customer to resubmit the document by clicking on the Request Resubmit.
If admin clicks on Request Resubmit button as in Figure 2.4.25, a column for reject reason and Reject button will appear under Action column as shown in Figure 2.4.26 :

Figure 2.4.27if they wish to reject, admin need to type in the reason in the column and then click on Reject button as shown in Figure 2.4.28 :

Figure 2.4.29after clicking Reject button as in Figure 2.4.29, “This case status has been updated” status will be displayed under Action column as in Figure 2.4.30 :

Figure 2.4.30
II. Processing Parcel Lost Issue
In order to get to Second stage, First stage needs to be passed through.
Processing Parcel Lost Issue are documents that already passed the checking of the Draft Parcel Lost Issue.
The record where admin click processing in Draft Parcel Lost Issue will be moved as shown in Figure 2.4.31 :

Figure 2.4.31If admin checks again and finds out that the document submitted by customer has no problem. Admin can click the ‘Pending’ button to move the customer request to Pending For Approval stage.
- after Admin clicks on Pending button as in Figure 2.4.31 , “This case status has been updated” status will be displayed under Action column as shown in Figure 2.4.32 :

- after Admin clicks on Pending button as in Figure 2.4.31 , “This case status has been updated” status will be displayed under Action column as shown in Figure 2.4.32 :
If admin finds out that there are some errors on the document submitted, admin can request customer to resubmit the document by clicking on the ‘Request Resubmit’ button.
if admin clicks on Request Resubmit button, a column for reject reason and Reject Button will appear under Action Column as shown in Figure 2.4.33 :

Figure 2.4.33steps to Reject is the same as in Draft Parcel Lost Issue.
if admin clicks on View Issue Detail button under Detail column as in Figure 2.4.34 , Parcel Issue Reporting Details will be displayed :
Based on Figure 2.4.35 is Parcel Issue reporting Details :
Figure 2.4.36Based on Figure 2.4.36, Parcel Content and Goods Value are editable.
Steps to edit them are the same in Draft Parcel Lost Issue.
III. Pending For Approach Parcel Lost Issue
- Final stage to claim the insurance, admin approve the claim request from customer, the customer request is accepted by insurance to approve RM50 for compensation.
Figure 2.4.37 below shows Pending For Approval Issue list :

Figure 2.4.37if admin clicks on View Issue Detail button under Detail column as in Figure 2.4.37, Parcel Issue Reporting Details will be displayed Figure 2.4.38 :

Figure 2.4.38Parcel Content and Goods Value are editable as shown in Figure 2.4.38.
Steps to edit them are the same in Draft Parcel Lost Issue.
IV. Approved Parcel Lost Issue
- Those claim request approved by admin will shown at here
Figure 2.4.39 below shows Approved Parcel Lost Issue list :

Figure 2.4.39if admin clicks on View Issue Detail button under Detail column, Parcel Issue Reporting Details will be displayed as in Figure 2.4.40 :

Figure 2.4.40Parcel Content and Goods Value are editable as shown in Figure 2.4.40
Steps to edit them are the same in Draft Parcel Lost Issue.
V. Rejected Parcel Lost Issue
- Those claim request reject by admin will shown at here
Figure 2.4.41 below shows Rejected Parcel Lost Issue list :

Figure 2.4.41if admin clicks on View Issue Detail button as in Figure 2.4.41 under Detail column, Parcel Issue Reporting Details will be displayed in Figure 2.4.41 :

Figure 2.4.41Parcel Content and Good Value are editable as in Figure 2.4.41
Steps to edit them are the same in Draft Parcel Lost Issue.
Update Version 4.6.0.1.0
Payment Type
when admin clicks on Parcel Details, they will be able to see the payment type as shown in Figure 2.5.0 :

Figure 2.5.0if admin clicks on Order Details, they can see that it also contains payment type written in format [Payment Gateway - Payment Type - Transaction No] as shown in Figure 2.5.1 :

Figure 2.5.1
Parcel Cancel Request Button
- When admin clicks on Parcel Cancel Request Tab, they will notice that the "Approve & Refund Parcel + SMS" button and "Approve & Refund Parcel Only" button's position has been swapped places as shown in Figure 2.5.2 :

Figure 2.5.2
Update Version 4.7.0.1.0
Address Change Request
Reject reason can now be selected from the dropdown list .
When admin clicks on Reject button as shown in Figure 2.5.3 :

Figure 2.5.3Figure 2.5.4 shows a dropdown list for reject reason that will be prompt out :

Figure 2.5.4Admin can select one of the options from the dropdown list as shown in Figure 2.5.5 and click Submit button to save changes made :

Figure 2.5.5
Update Version 4.9.0.1.0
Ship Status in Parcel List
Ship status will be displayed in Parcel List for Pgeon Parcel
Figure 2.5.6 shows the status "Parcel Collected At Dropoff Point" , when the parcel has been collected at dropoff point :

Figure 2.5.6Figure 2.5.7 shows the status "Parcel Collected At Pickup Point", when the parcel has been collected at pickup point :

Figure 2.5.7
Update Version 4.11.0.1.0
Insure Return
- RM1 return is a service used when customer decides to return their item.
Insure Return will be shown in parcel detail if customer purchased it as shown in Figure 2.6.0 :

Figure 2.6.0Based on Figure 2.6.0, theres a new naming for Pgeon point parcel which are Booked Drop Point and Scanned Drop Point.
and for Insure Return , system uses Scanned Return Point and Booked Return Point.
Admin are able to choose to refund sms only or insure return only or refund both as shown in Figure 2.6.1 :

Figure 2.6.1For parcel with insure return a new tab is added in parcel details as shown in Figure 2.6.2 :

Figure 2.6.2Based on Figure 2.6.2, system will show where the parcel is scanned and where it will arrive .
In parcel cancel request page, system will display whether the parcel have insure return or not. Figure 2.6.3 is an example :

Figure 2.6.3When admin clicks on Approve and Refund a pop up window will appear, from there admin are able to select an option to refund as shown in Figure 2.6.4 :

Figure 2.6.4
Update Version 4.14.0.1.0
Track Parcel in EasyTrack
Admin is able to directly track parcel by clicking on Tack This Parcel button highlighted in Figure 2.8.0 :

Figure 2.8.0When admin clicks the button, system will return the parcel tracking summary as shown in Figure 2.8.1 :

Figure 2.8.1Admin are also able to track multiple parcels (up to 15) . Based on Figure 2.8.2, the steps are as follow :

Figure 2.8.2- click on the checkbox of parcel that admin wish to track
- click on the purple "Track" button
Admin will be shows the list of courier based on parcel selected as in Figure 2.8.3 :

Figure 2.8.2by clicking on the courier tab, based on Figure 2.8.3, system will display the current tracking status of the parcel :

Figure 2.8.3Admin can see the full tracking details of the parcel by clicking on the parcel's tracking number.
Advance Search in Manage Report Issue
- Admin are now able to search by status and date as shown in Figure 2.8.4 :

Figure 2.8.4
Update Version 4.18.0.1.0
- The display for booked drop off point branch and scanned drop off point branch are updated as highlighted in Figure 2.7.0 :

Figure 2.9.0