1.0 User Manager
1.1 Manage User / Account
Figure 1.1.0 shows the way to Manage User / Account page :

Figure 1.1.0Figure 1.1.1 shows the main page of manage user / account :

Figure 1.1.1Based on Figure 1.1.1 there are five types of account status; Verified, Unverified, Pending, Suspend, Expired.
i. Verified
Figure 1.1.2 shows the verified tab.

Figure 1.1.2Verified account are user account which are verified and active accounts.
Figure 1.1.3 shows list of verified account user when admin clicks Verified tab :

Figure 1.1.3
ii. Unverified
Figure 1.1.4 shows Unverified tab.

Figure 1.1.4Unverified account status means user have not insert verification code to verify their account.
Figure 1.1.5 shows unverified user account list when admin clicks Unverified tab :

Figure 1.1.5
iii. Pending
Figure 1.1.6 shows Pending tab.

Figure 1.1.6Pending account means user account is currently pending from approval.
If admin clicks on pending tab, a list of pending account user will be shown as in Figure 1.1.7 :
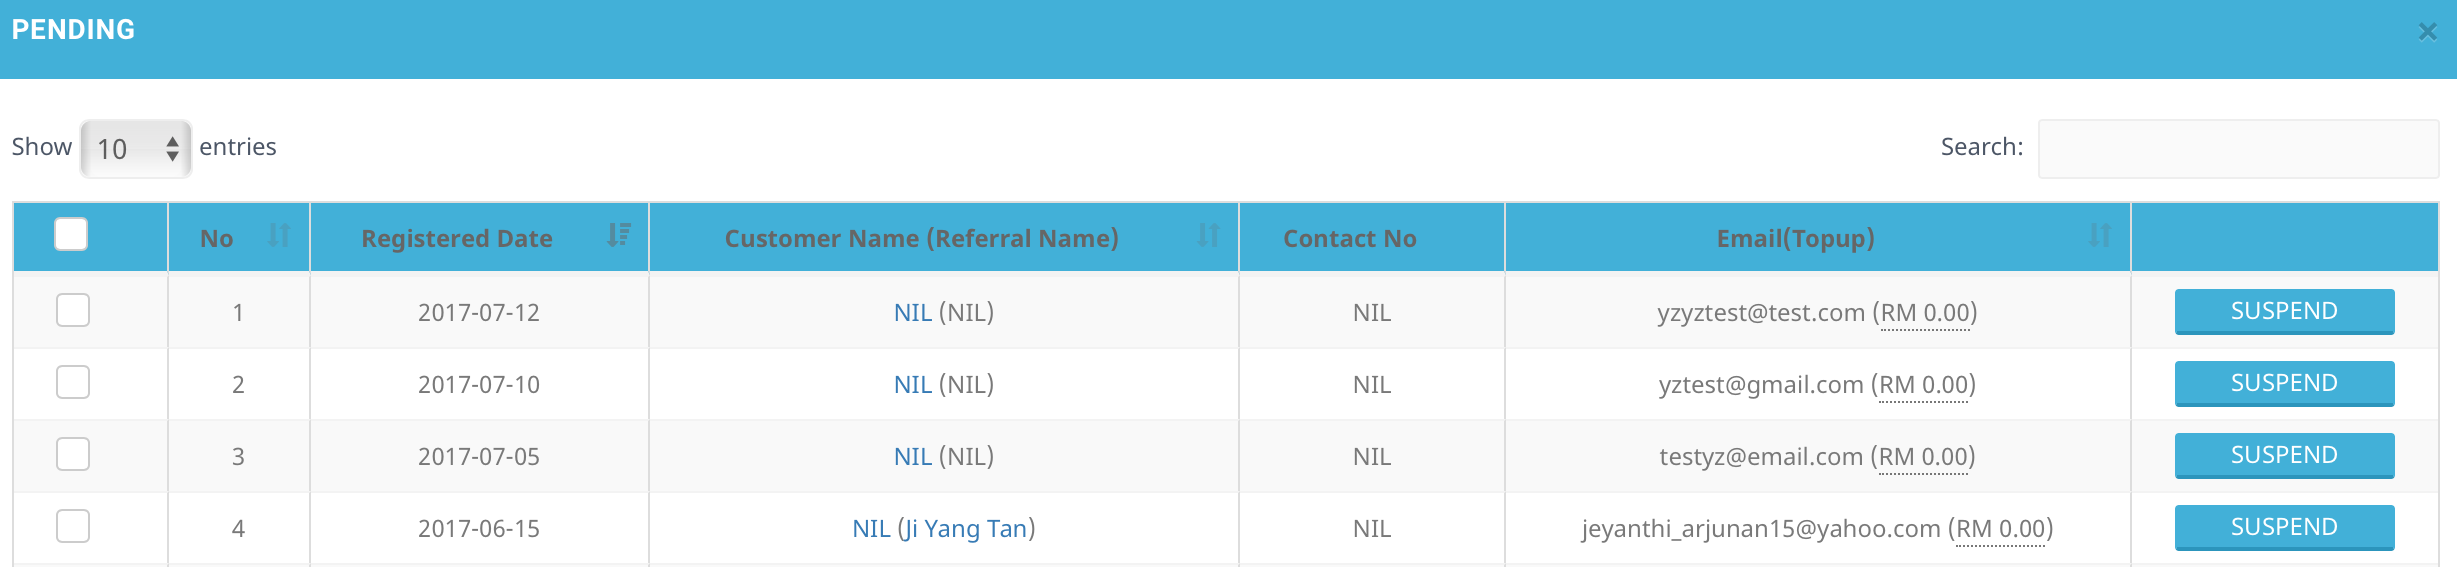
Figure 1.1.7
iv. Suspend
Figure 1.1.8 shows Suspend tab.

Figure 1.1.8User with suspended account status are not able to do any process unless activated again.
If admin clicks on suspend tab, a list of user with suspended account status will be displayed as shown in Figure 1.1.9 :
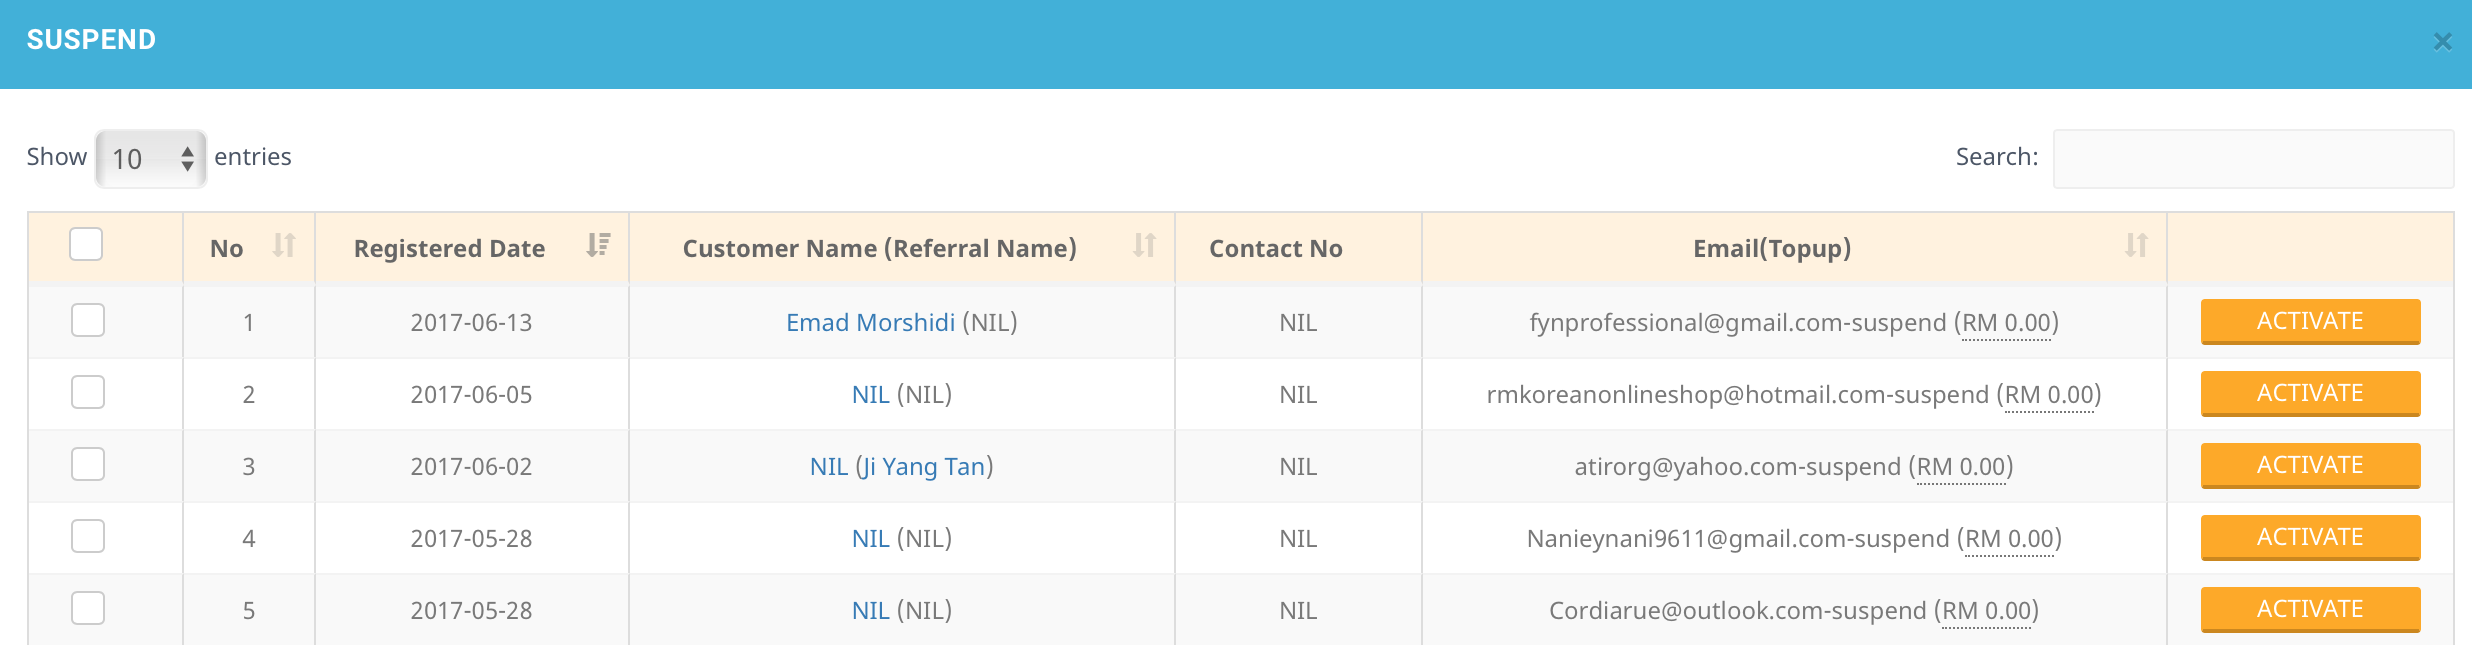
Figure 1.1.9
v. Expired
Figure 1.1.10 shows Expired tab.

Figure 1.1.10Expired accounts are account with expired credit when user haven't topup within a year.
If admin click on expired tab, a list of user with expired account will be displayed as shown in Figure 1.1.11 :
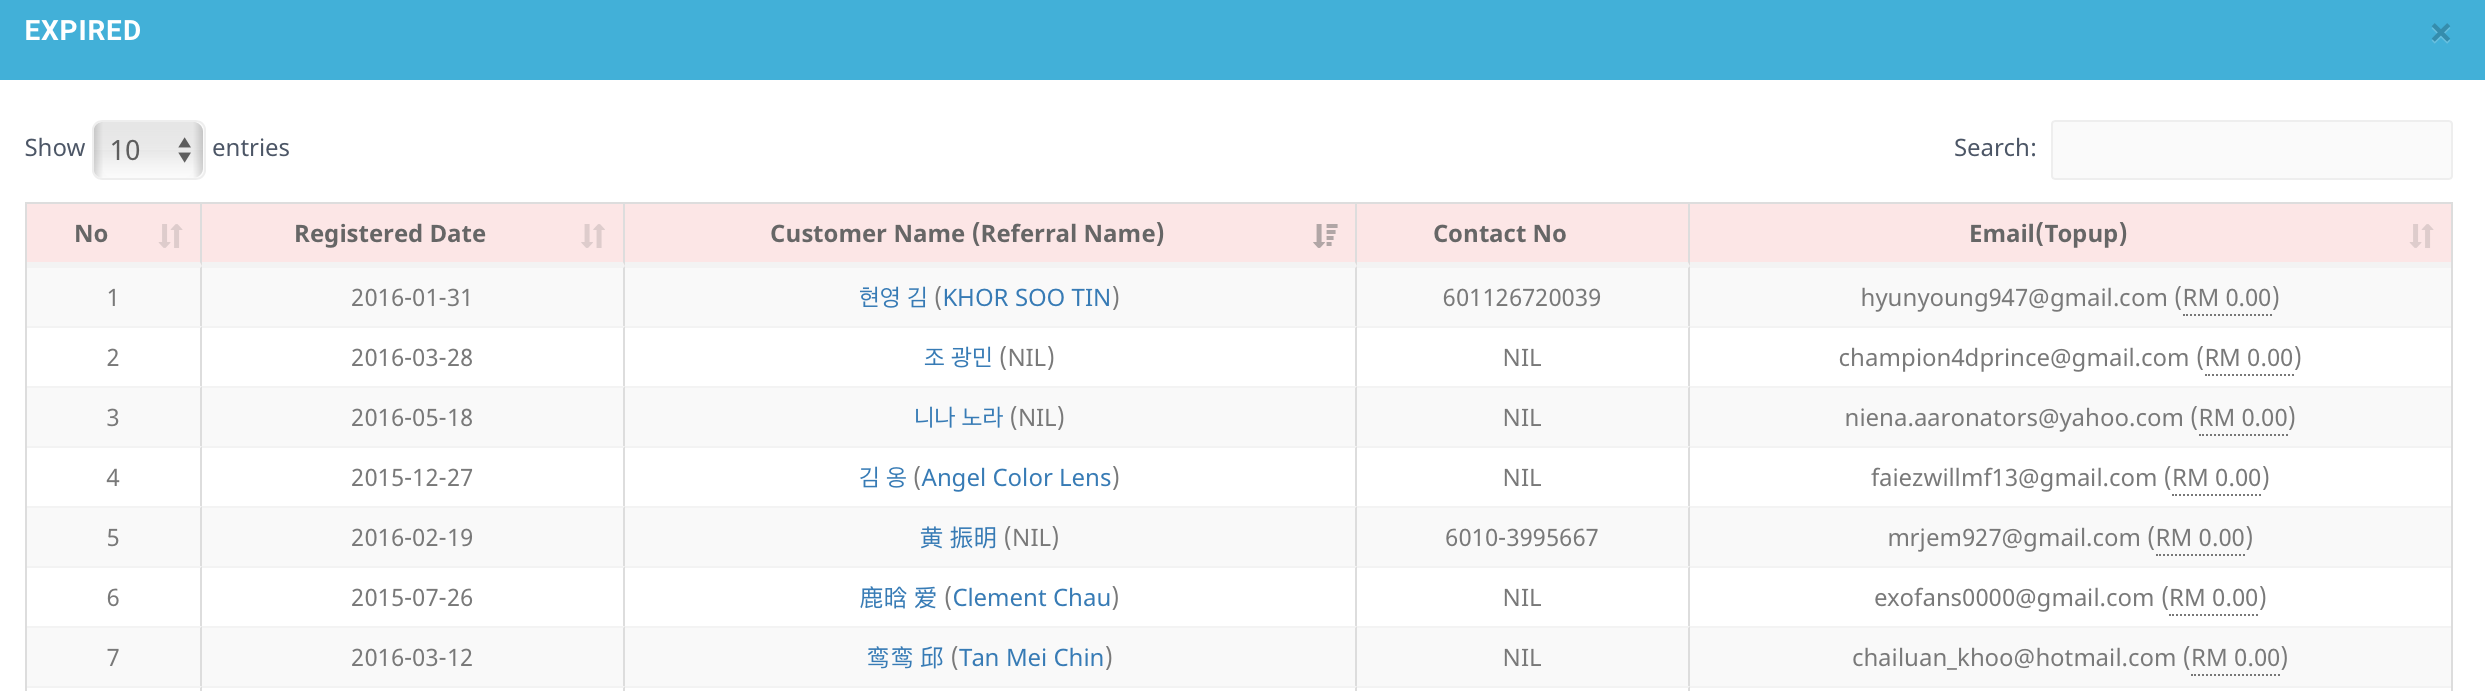
Figure 1.1.11
Suspend One User
- User with following account status can suspended :
- Verified
- Unverified
- Pending
Firstly, admin need to select a particular user account to be suspended. For example in Figure 1.1.12, admin wanted to suspend customer named Prasad Babu, they need to click on Suspend button (highlighted in red) :

Figure 1.1.12A pop up message will appear as in Figure 1.1.13 .

Figure 1.1.13If admin clicks Yes, they account will be changed to Suspend status.
Suspend Multiple Users
Admin can select few users to be suspended. For example in Figure 1.1.14, admin wanted to suspend the following five accounts, so they need to tick the checkbox of those 7 users

Figure 1.1.14Next, click Suspend button highlighted in Figure 1.1.15 :

Figure 1.1.15A pop up message will appear as in Figure 1.1.16 :

Figure 1.1.16If admin click Yes, the selected users account status will be changed to suspended .
Activate One User
- Suspended account can be activated.
For example based on Figure 1.1.17, admin wanted to activate user name Ching Yong Lee , they need to click on Activate button(highlighted in red). :

Figure 1.1.17A pop up message will appear as in Figure 1.1.18 :

Figure 1.1.18If admin clicks Yes, user account will be activated.
Activate Multiple User
Admin can select few users to activate their account. For example, in Figure 1.1.19 admin selected 3 users, they need to tick on their checkbox(highlighted in blue) and then click Activate button(highlighted in red) :

Figure 1.1.19A pop up message will appear as shown in Figure 1.1.20 :

Figure 1.1.20If admin click Yes, they suspended users account will be reactivated.
User Details
- Customer's profile consist of several tabs with relevant information. Figure 1.1.21 shows an example of user details page of a customer :

Figure 1.1.21
A. Account Info
i. User Dashboard
- Figure 1.1.22 shows user dashboard tab which contains summary of their credit information :

Figure 1.1.22
ii. Overview Details
- Figure 1.1.23 shows overview details tab which contains user's account status :

Figure 1.1.23
iii. Personal Details
Figure 1.1.24 shows personal details tab which contains basic information of a customer :

Figure 1.1.24Admin can edit user's contact number, but only if the contact number has already existed as in Figure 1.1.25 :

Figure 1.1.25Based on Figure 1.1.25, the steps to edit user's contact number is as follow :
- click on contact number , a column will appear as shown for admin to update
- click (√) button to save changes or click (x) to discard changes
Admin are also able to enter new verification code for user.
The steps to entering verification code is the same as editing user's contact number.
If the contact number not verified yet, admin can key in contact number and a verification code will be sent to the particular contact number.
iv. Credit Card Details
- In credit card details tab, admin are able to see user's credit card details if exist.
Figure 1.1.26 shows when user have no credit card details :

Figure 1.1.26If user have added their credit card details, the tab will appear as in Figure 1.1.27 :

Figure 1.1.27
v. Login Details
- Login details such as last login and date join by user is shown in Login Details tab as in Figure 1.1.28 :

Figure 1.1.28
vi. Address Details
- Admin details contains user address as shown in Figure 1.1.29 :

Figure 1.1.29
vii. Group Details
As shown in Figure 1.1.30, admin are able to see user's groups in group details :

Figure 1.1.30Admin can click on Edit button on Promotion Group column to add user to a promotional group.
Admin can select a promotional group from the dropdown that will appear and update changes made by clicking on Update button as shown in Figure 1.1.31 :

Figure 1.1.31Based on Figure 1.1.30, admin can assign API Key to user by clicking Request API Key button on Api Key column.
B. Topup History
- Topup history contains user's popup history logs as shown in Figure 1.1.32 :

Figure 1.1.32
C. Order History
Based on Figure 1.1.33 Order History tab contains user order history which is sorted by 4 order status :

Figure 1.1.33For example, in Figure 1.1.34, admin clicks on Paid status tab, a list of paid order by user will be displayed :

Figure 1.1.34If admin clicks on View Bill Details button, they will see more detailed information of biller. Figure 1.1.35 is an example :

Figure 1.1.35
D. Shipment History
- Shipment history is divided to basic and advance shipment history.
i. Basic Shipment History
Figure 1.1.36 shows basic shipment history which is sorted by 12 shipment status :

Figure 1.1.36A list of shipments will be displayed if admin clicks on the respective tabs. For example based on Figure 1.1.37, admin clicks on shipment status Delivered tab :

Figure 1.1.37
ii. Advance Shipment History
- Figure 1.1.38 shows advance shipment :

Figure 1.1.38
E. Credit History
- Credit history is divided to credit history and finance credit history .
i. Credit History
- Credit history contains user's transaction details.
- Figure 1.1.39 shows credit history tab :

Figure 1.1.39
ii. Finance Credit History
- Finance credit history shows user's credit balance as shown in Figure 1.1.40 :

Figure 1.1.40
F. Group History
- Group history shows which group user was assigned before. Figure 1.1.41 is an example :

Figure 1.1.41
Search Function
Based on Figure 1.1.42, there is a search function on the main page of manage user. It can be used to search user record from all five account status.
Figure 1.1.42Admin can search user by their name, email, ic no. or mobile no. as shown in Figure 1.1.43 :

Figure 1.1.43Based on Figure 1.1.44 is an example, the steps to search user by mobile no. :

Figure 1.1.44- enter user's mobile no. that wanted to search
- click search by button, a dropdown will appear
- choose mobile from the dropdown
- Figure 1.1.45 shows the search result :

Figure 1.1.45